


Prototype CNC machining vs production CNC machining is a strategic decision for manufacturers.
For product teams and engineering decision-makers, choosing how to manufacture new parts is not just a technical question. It directly affects launch timing, unit cost, and supply risk, especially because around 70–80% of total product cost is locked in during the design and early engineering phase..(Source:wikipedia)
In this guide, you’ll see exactly when to use prototype CNC machining vs production CNC machining, when to shift from one to the other, and how to build a smooth bridge between them so you avoid surprises, redesign loops and unnecessary budget waste.

What Is Prototype CNC Machining?
Prototype CNC machining is the use of CNC milling, turning, and related processes to produce small batches of parts quickly from production-grade materials, mainly for design, fit, and functional validation before you lock in a final design for mass production.
Definition and role in the product development lifecycle (concept, EVT, DVT, PVT)
In a product lifecycle, prototype CNC machining supports you from the first physical concept through to engineering validation. You typically use it in:
-
Concept & proof-of-concept (POC) – to turn CAD ideas into real parts you can hold, test, and review with your team or customers.
-
Engineering Validation Test (EVT) – to verify functions, interfaces, and critical performance in real materials.
-
Design Verification Test (DVT) – to refine details, tolerances, and manufacturability using parts that are close to final design.
-
Pilot / PVT (Production Validation Test) – to run small batches that simulate production, sometimes using near-production setups and inspection plans.

Because CNC machines cut from solid metal or plastic, you can prototype with the same alloys and plastics you plan to use in production. That means you validate heat dissipation, strength, sealing, and assembly behavior under realistic conditions, which is often not possible with basic resin 3D printing.
Typical quantities, lead times, and cost characteristics
Prototype CNC projects usually involve very low to low quantities, but they demand high responsiveness:
-
Typical quantities: from 1 piece up to 10–50 pcs for simple prototypes, and up to 100–200 pcs for pilot lots.
-
Lead times: standard CNC prototypes often ship in 2–7 working days, depending on complexity, material, and finishing; some rapid services can turn simple parts even faster.
-
Unit cost: higher cost per piece because setup, programming, and fixturing costs are spread over very few parts.
At this stage, you usually accept higher cost per part in exchange for speed and flexibility. You might run multiple design versions in parallel, change dimensions after the first batch, or tweak features between iterations. The goal is not cost optimization yet; the goal is to confirm that the design works and can be manufactured.
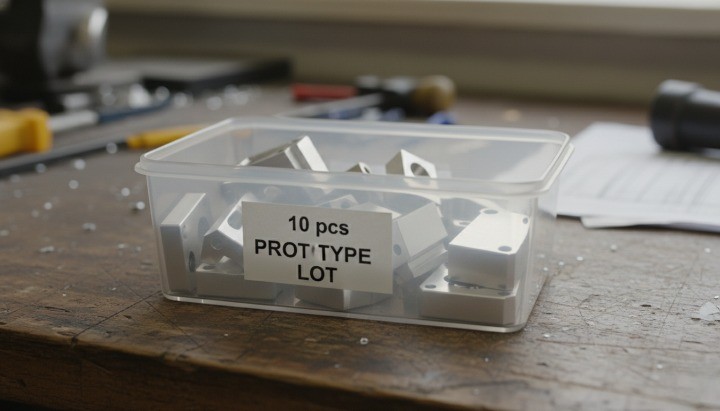
If you plan to move to production CNC or even die casting later, you should still think about basic DFM rules, tool access, wall thickness, and realistic tolerances. Early attention to manufacturability often avoids redesign and cost blow-ups when you scale up.
Common use cases: fit & function testing, design validation, samples, pilot units
You use prototype CNC machining whenever you need realistic, accurate parts in short timeframes without committing to expensive tooling. Typical use cases include:
-
Fit and assembly testing – checking interfaces, fastener positions, alignment, and stack-up tolerances on machinery, automotive, or robotic parts.
-
Functional and performance testing – validating strength, stiffness, thermal performance, or sealing in metals such as aluminum 6061/7075, stainless steel, or engineering plastics.
-
Customer demos and sales samples – providing high-quality parts that look and feel close to final products for exhibitions, investor demos, or pilot customers.
-
Pilot units / pre-series builds – building 20–200 units to test manufacturing flow, assembly procedures, packaging, and field performance.

If you offer one-stop CNC and finishing services like , you can also combine prototype machining with anodizing, powder coating, or basic assembly, so your engineering and sales teams work with parts that truly represent the end product.
Prototype CNC vs rapid CNC vs 3D printing vs other rapid methods
You have several options for early-stage hardware development. Each method has a different balance of speed, cost, and realism:
| Method | Typical Lead Time | Materials | Accuracy & Finish | Best For |
|---|---|---|---|---|
| Prototype CNC machining | ~2–7 days for small runs | Production metals & plastics | Tight tolerances (±0.005″ standard, tighter possible) | Functional tests, critical fits, pilot builds |
| Rapid / quick-turn CNC | Same-day to a few days | Similar to standard CNC | Similar to prototype CNC, with tighter scheduling | Urgent samples, design-review builds, last-minute changes |
| 3D printing (plastic/resin) | 1–3 days | PLA, ABS, resins, nylon, etc. | Good detail, but limited in mechanical properties | Early concepts, ergonomic models, non-load-bearing parts |
| Sheet metal / simple fab | Few days to 1–2 weeks | Steel, aluminum sheet | Moderate tolerances, good for enclosures | Brackets, covers, basic housings, test fixtures |
Prototype CNC machining stands out when you need production-grade materials, tight tolerances, and realistic surfaces, especially for mechanical and thermal performance testing. 3D printing is excellent for fast, low-risk form studies, but it rarely replaces CNC when you need real-world strength, sealing, or precise mating features.(Source:)

Advantages and limitations of prototype CNC machining
When you plan your development strategy, you should see prototype CNC machining as a high-value learning tool, not just a small batch production method. It offers clear strengths, but it also has limits you must respect.
Key advantages of prototype CNC machining:
-
Real materials, real performance – You can cut from the same aluminum, steel, or engineering plastics used in final production, so your tests reflect actual behavior in the field.
-
High accuracy and repeatability – Modern CNC machines routinely hold ±0.005″ (±0.127 mm) as a standard tolerance, and can reach ±0.001″ or tighter for precision features when needed.
-
Fast design iterations – You can update CAD, regenerate toolpaths, and cut a revised part within days instead of waiting weeks for new tooling.
-
No upfront mold cost – You avoid early investment in die casting or injection molds, which can run from thousands to tens of thousands of dollars.
Main limitations you should keep in mind:
-
High per-part cost at low volume – Setup, programming, and fixturing spread over 1–20 parts make each piece expensive compared to later production.
-
Less representative of future molded processes – If your final process will be die casting or injection molding, a CNC-machined prototype may not reflect draft angles, wall thickness constraints, or shrinkage behavior.
-
Capacity constraints – For repeated urgent prototypes during development, you need a supplier with enough CNC capacity and a stable scheduling system, otherwise lead times can creep up quickly.
Therefore, prototype CNC machining is ideal when you want to learn fast and reduce design risk, but you should already think about how the part will be made at scale and avoid creating geometries that are impossible or too expensive to manufacture in production.
What Is Production CNC Machining?
Production CNC machining is the use of CNC equipment, fixtures, and standardized processes to manufacture parts in consistent quality at repeatable volumes, typically from dozens to thousands of pieces per year, with a strong focus on cost, stability, and on-time delivery.
Definition and role in stable, repeatable manufacturing
Once your design is close to frozen and market demand is clearer, you move into production CNC machining. At this stage, your priorities change:
-
You care less about changing geometry and more about cycle time, scrap rate, and process capability.
-
You shift from ad-hoc setups to standardized work instructions, documented programs, and robust fixtures.
-
You align machining with your broader supply chain, inventory strategy, and delivery commitments.

A mature production CNC process becomes part of your overall manufacturing system, alongside die casting, forging, stamping, or assembly. It helps you meet contracts, quality targets, and cost-down goals over the life of the product.
Typical batch sizes, annual volumes, and production planning models
Production CNC machining usually supports recurring orders and planned schedules, not one-off jobs:
-
Typical batch sizes: from 50–100 pcs for low-volume, high-mix parts up to several thousand pieces per batch for stable programs.
-
Annual volumes: from a few hundred pieces per year for specialized machinery components to tens of thousands for automotive or electronics parts.
-
Lead times: initial production runs often take 3–8 weeks to prepare, including programming, fixturing, and first article inspection; once stable, repeat orders follow a regular schedule or blanket order plan.
You and your supplier usually plan around MRP or forecast data, and you may use safety stock, Kanban, or vendor-managed inventory (VMI) to balance demand volatility and machine utilization.
Equipment, fixtures, automation, and workflow in production CNC
Production CNC machining goes far beyond a single operator running a standalone machining center. A capable supplier builds an integrated workflow designed for throughput and repeatability:
-
Machine selection and layout – choosing the right mix of 3-axis, 4-axis, 5-axis, turning-milling centers, and multi-spindle lathes to match part geometry and volume.
-
Dedicated fixtures and tooling – custom workholding, soft jaws, and tool libraries that reduce setup time and improve consistency.
-
Process automation – pallet changers, bar feeders, robotic loading, and in-process gauging to keep spindles cutting and reduce manual variation.
-
Standardized work instructions – documented procedures for setup, tool changes, inspection, and handling.
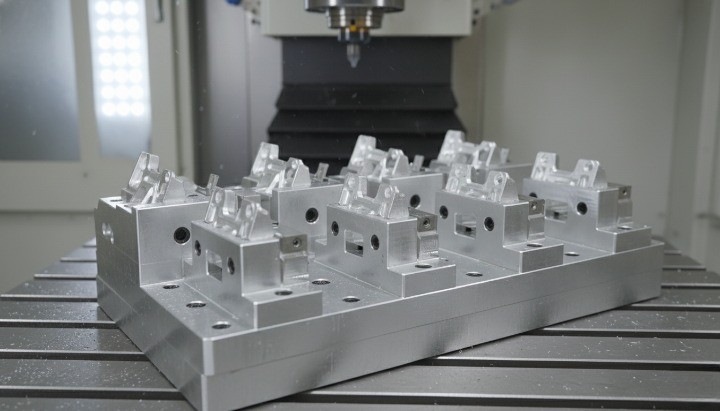
A partner like HM can combine CNC machining, aluminum and zinc die casting, and in-house finishing and assembly, so you reduce transfers between suppliers and keep more process control under one roof. This structure supports smoother production planning and fewer points of failure in your supply chain.
Quality systems and certifications (ISO, IATF, FAI, PPAP, SPC, traceability)
Production CNC machining for B2B customers depends on formal quality management systems and documented controls. Many buyers, especially in automotive, industrial, and medical sectors, now expect:
-
ISO 9001-based quality management systems, which define how a company plans, controls, and continually improves processes to meet customer and regulatory requirements.
-
IATF 16949 for automotive programs, which builds on ISO 9001 and adds specific requirements for automotive supply chains, including defect prevention and variation reduction.
-
First Article Inspection (FAI) to confirm that the first production parts meet all drawing and specification requirements.
-
Production Part Approval Process (PPAP) for automotive and similar industries, where you must submit samples, measurement reports, process flow, control plans, and capability studies for approval.
-
Statistical Process Control (SPC) on critical dimensions to monitor and maintain process capability (Cp, Cpk) over time.

These systems give you confidence that every batch of CNC-machined parts will behave the same way, which is essential when your product goes into vehicles, robots, medical devices, or energy equipment where failure is expensive or unsafe.
Industries and applications that rely on production CNC machining
Production CNC machining is a backbone technology across many B2B sectors. You will see it in:
-
Machinery and industrial equipment – gearbox housings, brackets, shafts, pulleys, bearing housings, and custom hardware that must handle high loads and harsh environments.
-
Automotive and commercial vehicles – engine blocks, cylinder heads, transmission components, braking and steering parts, and mounting structures, often combined with die casting or forging.
-
Electronics and telecommunications – aluminum housings, heat sinks, RF enclosures, and precision connector components where thermal and dimensional control are critical.
-
Robotics and automation – robot arms, end-effectors, structural frames, sensor mounts, and custom fixtures that require tight tolerances and stable geometry.
-
Medical and energy – surgical tools, implant components, test fixtures, and energy system parts, which often require strict traceability and validated processes.
For these industries, production CNC machining is not just about cutting metal. It is about building a reliable, auditable, and scalable process that supports your long-term product roadmap. When you combine production CNC with complementary processes like aluminum die casting, surface finishing, and assembly under one partner, you can simplify your supplier base and improve overall supply chain resilience.
Prototype CNC vs Production CNC – Key Differences That Drive Decision-Making
Volume and economics: from 1 piece to thousands per year

When you decide between prototype CNC and production CNC, volume is usually the first filter. Prototype CNC supports one-off parts and very small batches, while production CNC becomes more efficient as annual demand grows and stabilizes.
At prototype stage, you often order 1–20 pieces per revision. You might run several design versions, accept higher unit cost, and prioritize learning over optimization. Production CNC comes into play when your annual demand reaches hundreds or thousands of pieces and you need a repeatable process that supports forecasts and contracts.
You can think in simple volume bands:
-
1–20 pcs: prototype CNC only.
-
20–200 pcs: prototype or bridge production, depending on stability.
-
200–10,000+ pcs: full production CNC, sometimes combined with die casting or other forming processes. The exact threshold depends on part complexity, material, and your cost targets, but the higher the stable volume, the stronger the case for production CNC.
Cost structure: setup, NRE, cycle time, per-part and lifecycle cost
Prototype CNC and production CNC share similar machines, but their cost logic is different. Prototype CNC spreads programming, setup, and fixturing over very few parts, so the cost per piece is high but the total project cost stays manageable. Production CNC invests more upfront in optimization and tooling to reduce the long-term cost of every unit.
At prototype stage, most of your cost comes from:
-
Programming and CAM time.
-
Machine setup and manual fixturing.
-
Small-lot overheads and expedited scheduling. You accept this because you only need a small quantity and you expect to change the design.
In production CNC, the picture changes. You see:
-
Non-recurring engineering (NRE) for dedicated fixtures, gauges, and process tuning.
-
Shorter cycle times through optimized toolpaths and standardized setups.
-
Lower per-part cost as you spread NRE and setup across many batches and years.
A simple way to think about it is: prototype CNC optimizes cost per learning, production CNC optimizes cost per part over the product lifetime. When you evaluate quotes, you should not only compare today’s unit price, but also how that price behaves at higher volumes and over multiple years.
Lead time and responsiveness: rapid-turn vs scheduled capacity
Prototype CNC shops design their processes around speed and flexibility. Production CNC operations design around predictability and throughput. Both are important, but they support different moments in your project.
With prototype CNC, you expect:
-
Short lead times for simple parts.
-
Room for urgent changes between iterations.
-
Frequent communication around design tweaks and priorities. The shop often squeezes your job into gaps in the schedule or dedicates capacity specifically to prototypes.
Production CNC works differently. Lead times are longer at the beginning, because the supplier must plan tooling, programming, and first article inspection. Once the process is stable, deliveries follow an agreed schedule or blanket order. You still want responsiveness, but you cannot expect the same last-minute flexibility you enjoyed during prototyping.
In practice, you might work with a supplier that runs a dedicated prototype cell and separate production lines. When you choose a partner, it helps to ask whether they can support both modes and how they handle urgent changes without disrupting other customers’ production.
Tolerances, inspection, and quality expectations
Both prototype and production CNC can hold tight tolerances, but you apply quality expectations differently. In early development, you want to understand whether the design can meet critical dimensions and functions. In production, you want proof that the process can deliver those results every time.

During prototype CNC:
-
You typically focus inspection on a limited set of critical dimensions and interfaces.
-
You often accept minor cosmetic issues or non-critical deviations if they don’t affect the learning objective.
-
You may not require full inspection reports for every feature on the drawing.
During production CNC:
-
You define clear tolerance classes and sampling plans for all key dimensions.
-
You introduce in-process and final inspections, sometimes with statistical process control on critical features.
-
You may require formal documentation such as first article reports or production approval packages.
The key is alignment inside your team. Engineering determines which dimensions really need tight, controlled tolerances; purchasing and quality then work with the supplier to build a realistic plan. If you keep every prototype tolerance in the final drawing without review, you risk a production process that is too slow and too expensive.
Flexibility for design changes and engineering iterations
Prototype CNC exists to support change. Production CNC exists to survive change without breaking your supply chain. This difference drives how you plan engineering iterations.
In prototype CNC, you can:
-
Send updated CAD files between batches.
-
Try alternative geometries, materials, or surface finishes.
-
Move fast with limited internal approvals. You do not mind if fixtures are basic or if programs are reworked, because the goal is learning, not efficiency.
Once you shift to production CNC, every change has a cost. You must:
-
Update programs, fixtures, and sometimes gauges.
-
Re-validate critical characteristics and, in regulated sectors, repeat formal approval steps.
-
Coordinate changes across your own assembly, documentation, and stock.
This does not mean you must freeze the design forever. It means you should concentrate as many iterations as possible in the prototype and pilot phases, and then treat post-launch changes as controlled projects with clear justification and budget. Suppliers that offer both prototype and production services can help you plan which changes to handle before SOP and which to phase into later revisions.
Risk profile at different stages (technical, supply chain, financial)
When you compare prototype and production CNC, you also compare risk profiles. Prototype CNC mainly addresses technical and design risk. Production CNC must cover supply chain and financial risk as well.
Prototype CNC helps you:
-
Reduce the risk that your part will fail in real use.
-
Reveal design weaknesses before you commit to tooling or contracts.
-
Explore alternative solutions without large sunk costs.
Production CNC deals with:
-
The risk of late deliveries and line stoppages if processes are unstable.
-
The risk of warranty claims or recalls if quality drifts.
-
The financial risk of over- or under-investing in tooling, automation, and capacity.
A practical way to manage this is to treat prototype CNC, pilot runs, and production CNC as a continuous risk-reduction path. You start with small bets, gather data, then increase commitment as you gain confidence. This mindset helps engineering and purchasing work together instead of pushing for speed or low price in isolation.
Where Rapid CNC Machining Fits in Your Development Timeline?
What is rapid CNC / quick-turn CNC machining and how it extends prototype CNC?

Rapid CNC, or quick-turn CNC machining, is a service model built on prototype CNC, but optimized for very short lead times. The core technology is the same: CNC milling and turning from solid material. The difference lies in how the supplier schedules work, standardizes setups, and manages communication to ship parts in days instead of weeks.
You can think of rapid CNC as a specialized layer on top of prototype CNC. It uses:
-
Pre-qualified materials and standard stock sizes.
-
Established tooling libraries and fixture concepts.
-
Streamlined quoting and order handling. This allows you to move from CAD file to physical part much faster, which is valuable when you face tight milestones or last-minute design changes.
When to choose rapid CNC over traditional CNC and 3D printing?
Rapid CNC is not always necessary, but it becomes very powerful in specific scenarios. You should consider it when:
-
You have fixed external deadlines, such as trade shows, investor demos, or customer trials.
-
Your team discovers a critical design issue late in the schedule and needs updated hardware urgently.
-
You want to accelerate internal decision-making by putting physical parts in front of stakeholders.
Compared with traditional CNC slots, rapid CNC gives you shorter lead time at a premium price. Compared with 3D printing, rapid CNC gives you better material properties and more realistic tolerances, which you need for load-bearing parts, sealing interfaces, and precision assemblies.
If your question is purely about external shape or ergonomics, 3D printing can still be the fastest and cheapest option. If you must confirm that the part will actually survive in the real application, rapid CNC is often the safer choice.
Balancing speed, cost, and accuracy for urgent prototypes
When time pressure is high, it is easy to overpay or over-specify. A more deliberate approach helps you balance speed, cost, and accuracy in rapid CNC projects.
First, define what you really need from this urgent build:
-
Do you need exact tolerances everywhere, or only in a few critical areas?
-
Do you need cosmetic surface finishes, or will raw machined surfaces be enough?
-
Do you need full sets for multiple assemblies, or only a few samples for tests?
Then, discuss with your supplier how to simplify:
-
Relax non-critical tolerances to reduce machining time.
-
Combine operations where possible to cut setup overhead.
-
Reduce the number of unique part versions in this urgent batch.
You still benefit from the speed of rapid CNC, but you avoid spending money on features that do not influence the decision you must make this week. This is where a partner with both engineering and manufacturing capability can guide you, rather than simply accepting every requirement as written.
Using rapid CNC for short runs, pre-launch samples, and market testing
Rapid CNC is not only for one-off emergency prototypes. You can also use it strategically for short runs and pre-launch activities.

Typical applications include:
-
Pre-launch samples for key customers – sending near-final parts to selected customers or distributors for early feedback, while your production line is still ramping up.
-
Small pilot runs for field testing – building a limited batch for real-world tests in target environments, without committing to full production volumes.
-
Short-term gap coverage – using rapid CNC to bridge limited demand or fill temporary shortages before production processes reach steady state.
For example, if you plan to move a design to aluminum die casting plus CNC finishing later, you might first run a few small batches through rapid CNC. These batches help you:
-
Validate performance and user acceptance.
-
Fine-tune geometry and tolerances.
-
Collect early revenue or real-world data.
Once the design proves itself, you can switch to a more cost-efficient production route. In this way, rapid CNC becomes a flexible tool to buy time, validate assumptions, and reduce risk, rather than a costly emergency option you only use when something goes wrong.
From Prototype to Production – A Step-by-Step Transition Strategy
Moving from prototype CNC machining to production CNC machining is not a single jump. It works best as a structured, staged process. When you treat each stage deliberately, you reduce risk, protect your budget, and give both engineering and purchasing a clear roadmap.

Stage 1 – Concept & functional prototypes (high flexibility, fast changes)
In Stage 1, your main goal is learning, not optimization. You use prototype CNC machining to turn CAD designs into real parts and answer simple but critical questions: Does this concept work? Does it fit? Does it survive basic use?
At this point:
-
Design is still fluid, and you expect multiple versions.
-
Tolerances are indicative, not final.
-
You may use different materials to explore options.
You usually combine:
-
CNC prototypes for mechanical and thermal realism.
-
3D-printed mockups for quick form and ergonomics checks.
-
Simple fixtures or hand assembly to test interfaces.
The most important discipline in Stage 1 is to capture what you learn and feed it back into the design. Every prototype run should answer a clear question: a fit issue, a strength concern, or a manufacturability doubt. If you simply “make parts to see them,” you risk burning budget without moving closer to a production-ready solution.
Stage 2 – Engineering validation & pilot builds (10–200 pcs)
In Stage 2, you move beyond single parts and start validating how your design behaves as a system. You also begin to simulate elements of future production, even if you still use prototype CNC setups.
Typical goals in this stage are:
-
Confirming that the design meets functional requirements across multiple samples.
-
Testing assembly procedures and confirming that parts from different batches fit together.
-
Starting to define realistic tolerances and surface finishes.
Batch sizes often grow to 10–50 pcs for engineering tests and 50–200 pcs for pilot builds. These batches help you:
-
Measure variation between parts and identify sensitive dimensions.
-
Reveal issues that only appear when you assemble dozens of units.
-
Evaluate early suppliers on reliability and communication.
You can already ask your CNC partner to:
-
Use more stable fixturing instead of one-off clamping.
-
Apply a basic inspection plan to critical dimensions.
-
Provide feedback on DFM issues they see in the drawings.
This is the right time to start integrating quality and production thinking. If you wait until after launch to think about inspection plans or gauge design, you will feel unnecessary pressure and may accept weak compromises just to ship product.
Stage 3 – Bridge / low-volume production with CNC machining
Stage 3 is where you start behaving like a production organization, even if your quantities are still low. Many teams call this bridge production or low-volume production, and it is one of the most powerful ways to reduce risk.

In this stage, you:
-
Treat CNC machining as the actual production process for a defined period.
-
Use stable programs, fixtures, and inspection routines.
-
Ship parts to real customers or field-test environments.
Quantities may range from 50–500 pcs per order, depending on your industry. You can run several batches over months while you finalize demand forecasts and decide whether to invest in more dedicated capacity or alternate processes such as die casting.
Bridge production is especially valuable when:
-
Market demand is uncertain and you want to avoid early tooling investment.
-
Your design might still change slightly based on field feedback.
-
You operate in high-mix environments where even “production” volumes remain modest.
In practice, you can negotiate with your supplier to maintain a repeatable CNC setup that supports both bridge production and future scaling. This is where a partner with both prototype and production capability becomes very useful.
Stage 4 – Full production: optimized CNC lines or combined processes
Stage 4 is the point where you commit to a long-term manufacturing strategy. Your design is stable enough, your volumes are predictable enough, and you have enough data from pilots and bridge production to make informed decisions.
Here, you decide whether to:
-
Stay with CNC-only production, optimized for throughput and cost.
-
Move to combined processes, such as aluminum or zinc die casting plus CNC finishing, for higher volumes.
-
Split your strategy: CNC for low-volume variants and cast + CNC for core variants.
In full production, you expect:
-
Dedicated or semi-dedicated CNC lines with optimized toolpaths and fixtures.
-
Integrated quality control, including in-process checks, SPC for critical features, and periodic capability reviews.
-
Clear planning logic that links your forecasts, stock targets, and supplier capacity.
At this stage, your main questions are:
-
Are we meeting cost targets and margin expectations?
-
Are we meeting on-time delivery and quality requirements consistently?
-
Do we have a path to scale up or down when demand changes?
If you have moved from Stage 1 to Stage 4 in a controlled way, the answers are usually much more positive than if you rushed to production under time pressure.
Criteria to move from prototype CNC to production CNC (design, volume, budget)
Many teams struggle with the timing of the shift from prototype CNC to production CNC. Move too early, and you lock in a design that is not mature. Move too late, and you waste money on high-cost prototypes or delay cost reductions.
You can use three practical lenses to make this decision: design stability, volume clarity, and budget reality.
-
Design stability
-
Most critical functions and interfaces are now confirmed through tests.
-
Change requests are decreasing in frequency and impact.
-
The remaining changes are minor and can be handled through controlled revisions.
-
-
Volume clarity
-
You have realistic forecasts or early orders, not just hope.
-
The expected annual volume justifies investment in better fixtures and process optimization.
-
You know which variants will be core and which will stay niche.
-
-
Budget reality
-
The long-term cost of staying in prototype mode is clearly higher than the cost of moving to production.
-
You have allocated funds for NRE and potential tooling.
-
You understand how payback works over the product life.
-
A simple rule helps: you are ready to move when most of the risk is in market adoption and demand, not in basic technical feasibility. At that point, production CNC and related investments are tools to protect margin and supply reliability, rather than bets on an unproven idea.
Managing engineering changes between pilot runs and SOP
Even with good planning, you almost never go from pilot builds to SOP without any change. The difference between successful and painful launches is how you manage those changes.
Effective teams usually:
-
Classify changes by impact: cosmetic, performance, safety, regulatory, or cost-driven.
-
Define clear decision rules: which changes must go into SOP, which can wait for a later revision.
-
Align engineering, quality, purchasing, and operations on the change process.
On the supplier side, you should expect:
-
Updated CNC programs, setup sheets, and inspection plans for relevant changes.
-
New or updated first article inspections when critical features are affected.
-
Communication of any impact on lead time, scrap, or cost.
For your own internal flow, you may need to:
-
Update drawings, BOMs, work instructions, and service documentation.
-
Control old and new parts in inventory to avoid mixing.
-
Inform downstream customers if functional behavior changes.
To keep control, many companies use a formal engineering change process with clear approval gates. Even if your organization is smaller, adopting a simplified version of this discipline helps you avoid “silent” changes that only show up later as quality complaints.
Common mistakes when moving from prototype to production (and how to avoid them)
There are patterns in how projects go wrong when they cross from prototype CNC to production CNC. Knowing these patterns in advance allows you to design defenses against them.
Mistake 1: Treating prototype tolerances as final without review During development, engineers often add tight tolerances “just to be safe”. If nobody reviews them before production, you end up with processes that require excessive machining time or complex inspection for features that do not matter.
-
How to avoid it: run a dedicated tolerance review with your CNC partner and internal quality team. Challenge every tight tolerance: what happens if it relaxes slightly?
Mistake 2: Changing process along with geometry without validation Sometimes teams move from CNC prototypes to die casting plus CNC finishing, and change geometry at the same time. If you do both together, you cannot easily see whether problems come from shape, material flow, or machining.
-
How to avoid it: separate geometry changes from process changes whenever possible. First stabilize shape using CNC. Then shift to the new process and validate again.
Mistake 3: Underestimating capacity and lead time needs Prototype stages usually feel fast, because quantities are small and you can get attention quickly. If you expect the same flexibility in production without planning capacity, you may face delays or shortages.
-
How to avoid it: involve production planners early. Share realistic forecasts, ramp-up curves, and buffer expectations with your supplier.
Mistake 4: Late involvement of purchasing and quality If engineering drives prototypes in isolation, purchasing and quality only appear when it is already time to launch. They then must accept cost and process structures they did not help design.
-
How to avoid it: bring purchasing and quality into the conversation from Stage 2 onwards. Let them see early drawings, prototype feedback, and supplier options.
Mistake 5: Relying on a supplier that cannot scale Some shops are excellent at making prototypes but do not have the equipment, systems, or certifications to support larger volumes and formal approvals. You then must switch suppliers in the middle of the program.
-
How to avoid it: when you select prototype partners, already check their production capability, or choose a one-stop partner that covers both. Ask specifically about their experience with your target volume and industry requirements.
If you handle these common pitfalls proactively, the move from prototype CNC to production CNC becomes a controlled evolution instead of a stressful jump. That gives your team more time and energy to focus on real product value rather than firefighting manufacturing issues.
CNC Machining vs Die Casting + CNC Finishing for Production
When you plan for production, you do not just choose between prototype and production CNC. You often decide between CNC-only machining and die casting plus CNC finishing for aluminum and zinc parts. The right route depends on volume, geometry, and cost targets.
When CNC-only is best (high precision, low volume, complex geometry)?
CNC-only is usually the best choice when you combine complex geometry, demanding tolerances, and relatively low volume. In these cases, the cost and time for die casting tooling rarely make sense.
CNC-only production is often the better option when:
-
You expect low or medium annual volumes, for example a few hundred to a few thousand pieces.
-
Your design has deep pockets, thick sections, sharp internal corners, or undercuts that are hard to cast.
-
You must hold tight tolerances on many features, not just a few critical faces.
-
You foresee frequent design changes due to evolving customer needs or product updates.
In these conditions, CNC machining gives you maximum flexibility and precision without committing to tooling. You pay more per piece, but you avoid the risk of having a mold that no longer matches your design or demand profile.
When to switch to aluminum/zinc die casting with CNC post-machining?
Die casting becomes interesting when volumes rise and geometry fits the process. You still use CNC to finish critical surfaces, but the casting delivers the basic shape at much lower variable cost.

You should seriously consider aluminum or zinc die casting plus CNC finishing when:
-
Your annual demand for a part climbs into the thousands or tens of thousands.
-
The design can be adapted to cast-friendly rules: draft angles, uniform wall thickness, proper radii, and good flow paths.
-
Most features can tolerate casting-level tolerances, and only a few surfaces need CNC finishing.
-
You want lighter parts with integrated features, such as bosses, ribs, and mounting points that would be expensive to mill from solid.
In that context, the typical route is:
-
Use die casting to produce near-net-shape blanks.
-
Use CNC turning or milling to finish sealing faces, bearing seats, threaded holes, and tight-location features. This hybrid approach gives you a good balance of piece price, accuracy, and throughput for mature products.
If you work with a partner that offers both CNC and die casting under one roof, you can prototype in CNC, then redesign slightly for die casting, and still keep the same team and quality system during the transition.
Cost and lead time comparison: CNC machining vs die casting routes
It helps to compare the two routes side by side. The values below are qualitative and meant as a decision guide, not fixed rules.
| Aspect | CNC-only production | Die casting + CNC finishing |
|---|---|---|
| Tooling / NRE cost | Low (fixtures and gauges only) | High (die casting mold + fixtures and gauges) |
| Per-part cost at low volume | High | Very high (tooling not yet amortized) |
| Per-part cost at high volume | Medium to high | Low to medium |
| Design change flexibility | High (program and fixture changes) | Medium to low (mold modifications can be expensive) |
| Typical volume sweet spot | Prototypes to low/medium production | Medium to high volume, long-running programs |
| Lead time to first good parts | Short to medium | Longer (tool design, build, and trials) |
| Geometric freedom | Very high (within tool access limits) | Moderate (must follow casting rules) |
In simple terms, CNC-only wins on flexibility and time-to-first-part; die casting plus CNC wins on piece price at scale, as long as you can commit to the volume and accept the process constraints.
Example lifecycle: CNC prototype → CNC pilot → die casting + CNC mass production
A common and very practical lifecycle for aluminum housings or structural parts looks like this:
-
CNC prototype
-
You start with CNC-machined parts from solid aluminum.
-
You test fit, function, and thermal behavior, and you refine the design.
-
-
CNC pilot / bridge production
-
You run 50–200 pcs per batch using more stable CNC fixtures.
-
You collect field data and customer feedback and finalize tolerances and surfaces.
-
-
Die casting design adjustment
-
You adapt the design for die casting: add draft, adjust walls, improve flow and feeding.
-
You work with your supplier’s engineering team to balance casting constraints and machining needs.
-
-
Tooling and initial casting runs
-
The supplier designs and builds the die casting mold.
-
You run first casting trials, then CNC-finish the critical features and validate with full inspection and functional tests.
-
-
Mass production: die casting + CNC finishing
-
You ramp up to your target volume using cast blanks plus CNC finishing.
-
You monitor cost, quality, and lead time and refine parameters as programs mature.
-

In this lifecycle, CNC machining stays in the picture from start to finish, but its role evolves from making complete parts to finishing castings. This combined approach lets you move step by step, rather than betting everything on a mold before your design and demand are proven.
Industry-Specific Perspectives on Prototype vs Production CNC
Different industries use prototype and production CNC in distinct ways. The core technologies are the same, but volume expectations, risk tolerance, and approval requirements change how you design your strategy.
Machinery & industrial parts – high-mix, low/medium-volume strategies
In machinery and industrial equipment, you often face high-mix and relatively low-volume portfolios. Many parts are customized or configured per project, and product lifecycles can be long.
In this environment:
-
Prototype CNC is used to validate new assemblies, fixtures, frames, and powertrain parts.
-
Production CNC often remains the main route for the full life of the product, because volumes per part may never justify tooling.
-
Bridge production and production CNC look similar, but you continuously refine fixtures, tools, and programs.
CNC-only strategies are common here, sometimes with cast or forged blanks for larger parts. The main focus is on reliability, lead time, and the ability to handle design changes or special variants for key customers. A supplier who can manage small batches efficiently and keep stable quality across many part numbers is more valuable than one who only optimizes for single, high-volume components.

Automotive & transportation – volume, PPAP, and cost-down over time
Automotive and transportation programs usually combine higher volumes, strict approvals, and aggressive cost targets. Parts often run for many years, and OEMs expect structured cost reductions over time.
In this sector:
-
Prototype CNC supports early mule builds, test rigs, and first-on-vehicle trials.
-
Pilot and pre-production batches often still use CNC, sometimes from machined bar or from prototype castings.
-
Once demand is confirmed, most structural and housing parts migrate to die casting, forging, or stamping plus CNC finishing, while critical precision components may stay CNC-only.
Automotive customers require processes like PPAP, FAI, capability studies, and traceability, so your production CNC or die casting partner must have mature quality systems. Over the program life, teams push for cycle time improvements, tool life extensions, and design simplifications to keep margins healthy. Here, the shift from prototype to production is as much about documentation and control as it is about the physical process.
Electronics & robotics – precision housings, heat sinks, and small batches
Electronics and robotics often demand precision housings, heat sinks, and structural parts in aluminum or other alloys. Volumes can vary from small batches for industrial robots to higher numbers for standard controllers and devices.

In these industries:
-
Prototype CNC plays a key role in early design, especially for thermal management and layout of connectors and PCBs.
-
For lower-volume equipment and robots, CNC-only production may remain the main route because flexibility and customization outweigh unit-cost concerns.
-
For standard modules and consumer-oriented products, die casting or extrusion plus CNC becomes attractive once designs stabilize and demand grows.
Because external appearance matters, you often combine CNC machining with anodizing, bead blasting, or other finishes. Prototype and production phases must therefore consider not only geometry, but also surface preparation and coating compatibility from the beginning.
Medical & energy – regulatory requirements, validation, and reliability
Medical and energy sectors add another layer: regulation and long-term reliability. Parts in these fields may be subject to standards, audits, and extensive validation before you can change processes or suppliers.
In medical devices:
-
Prototype CNC supports clinicians and engineers as they refine designs for instruments, housings, or implant-adjacent components.
-
Once you approach clinical or regulatory milestones, you need stable, documented processes even for relatively low volumes.
-
Changes after approval can trigger new validation steps, so teams aim to concentrate design iteration before formal submissions.
In energy applications, such as power systems, oil and gas, or renewables:
-
Prototype CNC helps test parts in demanding environments, such as high temperature, pressure, or corrosion.
-
Production CNC focuses on robustness and traceability, sometimes with additional material and process certifications.
In both sectors, the decision between prototype and production CNC is strongly influenced by qualification costs and change control, not only by unit price. Even if volumes are modest, the burden of re-qualification can make it rational to invest in well-controlled production CNC processes earlier, rather than staying in an informal prototype mode for too long.
Across all these industries, the pattern is similar: prototype CNC reduces design and technical risk; production CNC and, where appropriate, die casting plus CNC finishing reduce cost and supply risk over time. The balance and timing of each step simply change with your market, your volumes, and your regulatory environment.
Design & DFM Guidelines for Both Prototype and Production CNC
Good design for CNC machining starts on day one. If you apply simple DFM rules early, you protect both prototype budgets and long-term production cost.
Designing CNC parts for manufacturability from day one
When you design for CNC, you are designing for cutting tools, fixturing, and repeatability. You do not need to make your parts “ugly” to be manufacturable, but you should respect a few practical rules from the first sketch.
Useful principles include:
-
Align features with standard tool motions where possible (simple planar faces, holes along axes, pockets with clear access).
-
Avoid unnecessary complexity, such as tiny fillets, deep narrow slots, or decorative features that add machining time without adding function.
-
Group critical features so the machinist can reach them in as few setups as possible, which improves accuracy and reduces cost.
If you treat CNC machinists as part of your design team, you will get feedback that saves time and money later. A short DFM review before you release drawings often pays back many times over during production.
Choosing materials for prototypes vs production (aluminum, zinc, steel, plastics)
Material choice affects machinability, cost, and performance. For prototypes, you sometimes choose a more machinable or more available material. For production, you must balance real-world performance, regulatory requirements, and long-term cost.
A practical approach is:
-
Aluminum (e.g., 6061, 6082, 7075): very machinable, good strength-to-weight ratio, excellent for housings, brackets, and structural parts in many industries. 6061/6082 often serve for prototypes and production; 7075 suits higher-strength needs.
-
Zinc alloys: better suited to die casting, then CNC finishing. They offer good castability and tight tolerance capability in cast form, useful for smaller parts and complex shapes.
-
Carbon steels and alloy steels: chosen when you need higher strength, wear resistance, or specific mechanical properties. They may increase cycle time and tool wear compared with aluminum.
-
Stainless steels: necessary for corrosion resistance, medical and food applications, or harsh environments, but they are harder to machine and may require more robust tooling and coolant strategies.
-
Engineering plastics (e.g., POM, PEEK, nylon): ideal for low-friction parts, electrical insulation, or weight reduction. They can behave differently from metals in clamping and cutting, so DFM should consider warpage and thermal expansion.
For prototypes, you can sometimes choose the same alloy family but a slightly easier variant to machine, as long as mechanical behavior remains representative. For production, you lock in materials that match standards and approvals and talk with your CNC partner about tool selection and feeds to keep cost under control.
Tolerance strategies: where to be tight, where to relax for cost savings
Tolerances are one of the strongest cost drivers in CNC machining. Tight tolerances increase cycle time, scrap risk, and inspection effort. The key is to be tight only where it matters.
A practical strategy is:
-
Identify critical-to-function features, such as bearing seats, sealing faces, mating bores, and alignment pins. These can justify tight tolerances and extra inspection.
-
For non-critical features, such as cosmetic edges, non-mating holes, or surfaces that only carry labels, apply standard general tolerances that match your CNC partner’s normal capability.
-
Avoid specifying more decimal places than needed. If ±0.1 mm works functionally, do not call ±0.01 mm just because the CAD system makes it easy.
You can also structure drawings so that not all dimensions require full inspection every batch. Work with your supplier to define sampling plans and focus SPC on a small set of high-impact features. This keeps quality high without overloading both teams with unnecessary measurement work.
Considering tool access, wall thickness, and fixturing in your design

Tool access, wall thickness, and fixturing determine how easy it is to make your part in the real world. You may not draw fixtures, but you should picture how tools and clamps will touch your design.
Good practice includes:
-
Provide clear tool paths: allow end mills and drills to reach features without extreme tool length or awkward angles whenever possible.
-
Avoid very thin unsupported walls, which can chatter, deflect, or vibrate during machining. Slightly thicker walls often save time and scrap.
-
Create stable clamping surfaces: add flats or pads where fixtures can grip the part without deforming critical surfaces.
-
Consider whether the part can be machined in two or three setups instead of many. Each additional setup adds time and potential misalignment.
If you know a part will transition to die casting later, align your design with both CNC and casting needs: maintain reasonable draft angles, consistent wall thickness where possible, and radii that support both mold flow and tool access.
Planning surface finish and post-processing (anodizing, coating, polishing)
Surface finish has both functional and cosmetic roles. It affects friction, sealing, corrosion resistance, and perceived quality. It also has a direct influence on machining time and secondary operations.
You should:
-
Decide early which surfaces require fine finish and which can remain as-milled or as-turned.
-
Align your Ra requirements with realistic CNC process capability and cost. For example, a very low Ra may require slower passes or additional operations.
-
Consider post-processes such as anodizing, powder coating, painting, bead blasting, or polishing. Each of these adds time and cost, and some will change dimensions slightly.
If you expect to use anodizing on aluminum parts, design with enough allowance for the coating thickness and discuss with your supplier how they control dimensions before and after anodizing. When you use coatings for corrosion resistance, you may tighten or loosen certain tolerances depending on whether the coated surface is functional or purely cosmetic.
You can also plan where to introduce texture or blasting to hide machining marks and provide a consistent look. This is especially important for visible electronic housings or medical enclosures.
Using small-batch CNC runs to validate DFM and process capability
Small-batch CNC runs are a powerful tool to validate your DFM decisions and understand process capability before full production. Instead of jumping directly from a single prototype to mass production, you can use a few structured batches to test your assumptions.
In practice, you might:
-
Run a 10–30 piece batch to check tolerance distribution, tool wear, and clamping stability.
-
Review inspection data with your supplier to see which dimensions are naturally stable and which need attention.
-
Adjust tolerances, tool paths, or fixturing based on real data rather than theory.
This approach turns your early orders into learning experiments. You treat each small batch as an opportunity to fine-tune design and process together, so by the time you reach higher volumes, you already know where the process is strong and where you must monitor more closely.
Done well, small-batch CNC runs become a bridge between design intent and production reality. They reduce the chance of surprises during ramp-up and give both sides confidence that the chosen strategy can support real-world demand.
Supplier & Sourcing Strategy for B2B Buyers and Engineering Teams

Choosing the right CNC partner is as important as choosing the right process. For B2B projects, you need suppliers who understand both prototype urgency and production discipline, and who can support you across product lifecycles.
How to evaluate prototype CNC shops vs production CNC manufacturers?
Prototype shops and production manufacturers often have different strengths. You can evaluate them along a few simple axes.
For prototype CNC shops, focus on:
-
Responsiveness: how quickly they quote and deliver, and how well they handle design changes.
-
Engineering support: whether they give DFM feedback or only execute drawings.
-
Flexibility: their ability to run multiple iterations without long delays.
For production CNC manufacturers, focus on:
-
Process robustness: evidence of standardized work, maintenance, and quality control.
-
Capacity and scalability: number and type of machines, shift patterns, and planning systems.
-
Compliance: certifications, previous experience with your industry, and documentation practices.
An ideal situation is to work with a single partner who can handle both modes, with prototype cells and production lines under one quality system. This reduces handover friction and keeps process knowledge in one place.
Benefits of a one-stop partner (CNC machining, die casting, finishing, assembly)
A one-stop partner that combines CNC machining, aluminum and zinc die casting, surface finishing, and assembly can simplify your supply chain and improve coordination.
Key benefits include:
-
Fewer supplier interfaces: you send drawings and specifications once, and the same team manages the full manufacturing route.
-
Better DFM decisions: engineers see the trade-offs between CNC-only and die casting plus CNC, and can advise based on actual capabilities, not theory.
-
Aligned quality control: one system covers machining, casting, and finishing, which reduces gaps and miscommunication.
-
Simplified logistics: you receive finished assemblies or ready-to-use parts instead of coordinating multiple sub-suppliers.
For example, working with a partner like HM that offers CNC machining, aluminum/zinc die casting, anodizing, and assembly allows you to prototype in CNC, then move to combined processes without changing supplier. That continuity is especially valuable for programs with long life and global customers.
Key questions to ask suppliers about capacity, quality, and export experience
When you evaluate CNC and die casting partners, you can ask a few targeted questions to reveal their real capabilities.
On capacity and capability:
-
Which machine types and sizes do you run, and how many of each?
-
What is your typical batch size range, and what do you consider your sweet spot?
-
How do you handle urgent prototype work while running ongoing production?
On quality and process control:
-
Which quality certifications do you hold, and for which scope?
-
How do you manage first article inspections, capability studies, and ongoing SPC?
-
Can you share examples of control plans or typical inspection routines for similar parts?
On export and communication:
-
Which regions do you already serve (Europe, Americas, Australia, Middle East)?
-
How do you manage packaging, export documentation, and logistics for overseas customers?
-
Who will be the main technical and commercial contacts, and how do you handle time zone differences?
Clear answers to these questions tell you more than a generic capability list. They show whether the supplier has real experience with B2B customers like you.
How to structure RFQs for both prototype and production stages?
A good RFQ does not only ask for price. It gives your supplier the context they need to propose the right strategy. For this topic, you can structure RFQs in two linked parts: prototype and production.
Include at least:
-
3D models and 2D drawings with clear tolerances and material specs.
-
Estimated annual volume and expected volume ramp.
-
Information about application and critical features.
-
Whether you expect a future shift to die casting or other processes.
You can then request:
-
A quote for prototype CNC batches (e.g., 5, 20, 50 pcs).
-
A quote for production CNC at higher quantities.
-
If relevant, a high-level concept for die casting plus CNC finishing for future volumes.
This structure lets you compare short-term and long-term cost and see how each supplier thinks about lifecycle strategy. It also invites them to suggest process improvements, not just fill in a price cell.
Global sourcing considerations for Europe, Americas, Australia, Middle East
If you source from outside your region, you gain cost and capacity options but add complexity. With CNC and die casting suppliers in China or other manufacturing hubs, you should pay attention to a few extra points.
Important considerations are:
-
Lead time and shipping: include transit time, customs, and potential delays in your planning. Work with suppliers who have stable export experience to Europe, the Americas, Australia, or the Middle East.
-
Communication: ensure you have clear English communication, defined response times, and shared tools for drawing and data exchange.
-
Standards and expectations: align on units, tolerances, drawing conventions, and quality standards at the start to avoid misinterpretations.
-
Risk and backup: consider whether you need dual sources for critical parts, and how you will manage demand spikes or disruptions.
A supplier used to working with international B2B customers will already have templates and habits that make this easier: standard packing practices, familiarity with Incoterms, and experience handling engineering questions remotely. If you choose such a partner and plan your logistics carefully, global sourcing of CNC and die casting can deliver both cost efficiency and reliable quality for your projects.
FAQs – Direct Answers to Common Questions
When is prototype CNC machining better than 3D printing or rapid prototyping?
Prototype CNC machining is better when you need real materials, real tolerances, and real performance. If your parts must carry load, seal fluids, manage heat, or assemble with other precision components, CNC gives you closer-to-production behavior than most 3D printing processes.
3D printing is useful for form, fit, and early concept models, especially when the main questions are size, ergonomics, or layout. When the questions involve strength, wear, or accurate mating features, you should switch to prototype CNC. For urgent projects, rapid CNC gives you the same benefits with shorter lead times.
How do prototype and production CNC machining costs compare per part?
Prototype CNC has higher cost per part because setup, programming, and fixturing are spread over a few pieces. You pay a premium for flexibility and speed.
Production CNC reduces unit cost by optimizing cycle time and spreading NRE over larger volumes. You still pay for setup and tooling, but the cost per piece drops as quantity grows. A simple way to look at it is: prototype CNC optimizes cost per learning; production CNC optimizes cost per part over the product life.
What are typical lead times for prototypes vs production batches?
Prototype CNC and rapid CNC can often deliver simple parts in a few days and more complex parts in one to two weeks, depending on material and finishing. This speed supports tight development cycles and frequent design changes.
Production batches usually require several weeks for the first run, because the supplier must finalize programs, fixtures, and inspection plans. Once the process is stable, repeat orders follow an agreed schedule. Lead time then depends on batch size, capacity, and your forecast accuracy.
Can prototype CNC programs, setups, and fixtures be reused in production?
You can reuse many elements from prototype work, especially if you design with production in mind from the start. Toolpaths, workholding concepts, and basic setups often carry over, but they may need refinement for cycle time, tool life, and stability.
In practice, suppliers frequently start from prototype programs and evolve them into production-ready versions. Fixtures may move from simple clamps to more robust dedicated tooling, but the prototype experience still gives valuable insight into where the process is easy and where it needs extra support.
Which materials are recommended for prototypes vs long-term production?
For prototypes, you should use materials as close as possible to the final choice, especially when you test strength, temperature behavior, or wear. Common examples include aluminum 6061 or 6082, carbon steels, stainless steels, and engineering plastics like POM or nylon.
In production, you might refine material choice to match standard grades, certifications, and supply chain availability. You still stay in the same family, but you define exact tempers, standards, and surface requirements. For zinc and aluminum die casting plus CNC finishing, you design around casting-grade alloys and then use machining to hit tight features.
How to decide between CNC machining and die casting for a new project?
Start with volume, geometry, and flexibility. CNC machining alone is usually best when you expect low or medium volume, complex shapes, or frequent updates. Die casting plus CNC finishing becomes attractive when you have stable demand in the thousands and cast-friendly geometry.
You can also think in stages. Use CNC machining for prototypes and early production, then review volume and cost data. If the part proves successful and demand stabilizes, you can invest in die casting tooling and keep CNC for critical surfaces. This staged approach reduces risk and avoids tooling investment for parts that never reach scale.
What to do if the design changes after production has started?
If the design changes after production start, you should treat it as a controlled engineering change, not just an informal adjustment. Update drawings, models, and specifications. Then coordinate with your supplier on program changes, fixture updates, and any new inspection needs.
You also need to manage stock and field parts. Decide whether you will mix old and new versions or phase out the old design completely. For critical functions, run new validation tests. Clear communication between engineering, quality, purchasing, and operations prevents unexpected mixing or mislabeling.
How should engineering and purchasing teams align on prototype vs production strategy?
Engineering and purchasing should agree early on what each project stage is trying to achieve. Engineering focuses on function and manufacturability; purchasing focuses on cost, risk, and supplier performance. Both sides need the same map of prototype, pilot, and production phases.
Useful habits include:
-
Joint reviews of key drawings and tolerances before production.
-
Shared visibility on volume forecasts and ramp plans.
-
Early involvement of purchasing when selecting prototype suppliers, so they can evaluate long-term potential, not just prototype price.
When both teams see prototype CNC as a planned step towards production, decisions about cost and timing become easier and more consistent.
What information should I prepare before requesting a prototype & production CNC quote?
To get meaningful quotes for both prototype and production CNC, you should prepare more than just a CAD file. At minimum, gather:
-
3D models and 2D drawings with clear tolerances and material specs.
-
Estimated annual volume and an idea of how fast you will ramp up.
-
A list of critical features and surfaces, including any special finishes.
-
Information about the part’s application, such as load, temperature, or environment.
-
Your view on future processes, for example whether you might move to die casting later.
With this information, a good supplier can propose separate prices for prototypes and production, along with guidance on DFM and possible process routes. This helps you compare short-term feasibility with long-term cost and choose a strategy that fits your business, not just your next order.
Conclusion
Choosing between prototype CNC machining and production CNC machining is not just a technical detail; it is a way to match your manufacturing approach to your current stage and volume. Use prototype CNC when you need speed, flexibility, and learning, and use production CNC when your design is stable and your demand justifies NRE and process optimization. When volumes climb and geometry suits it, die casting plus CNC finishing can further reduce unit cost while CNC protects precision. A simple internal checklist that asks “What stage are we in? How clear is our demand? How hard is this part to change later?” will keep your team aligned on the right path.
If you want a concrete next step, you can share your 3D/2D drawings, target materials, and estimated annual volumeCNC machining, die casting, surface finishing, and assembly in one place